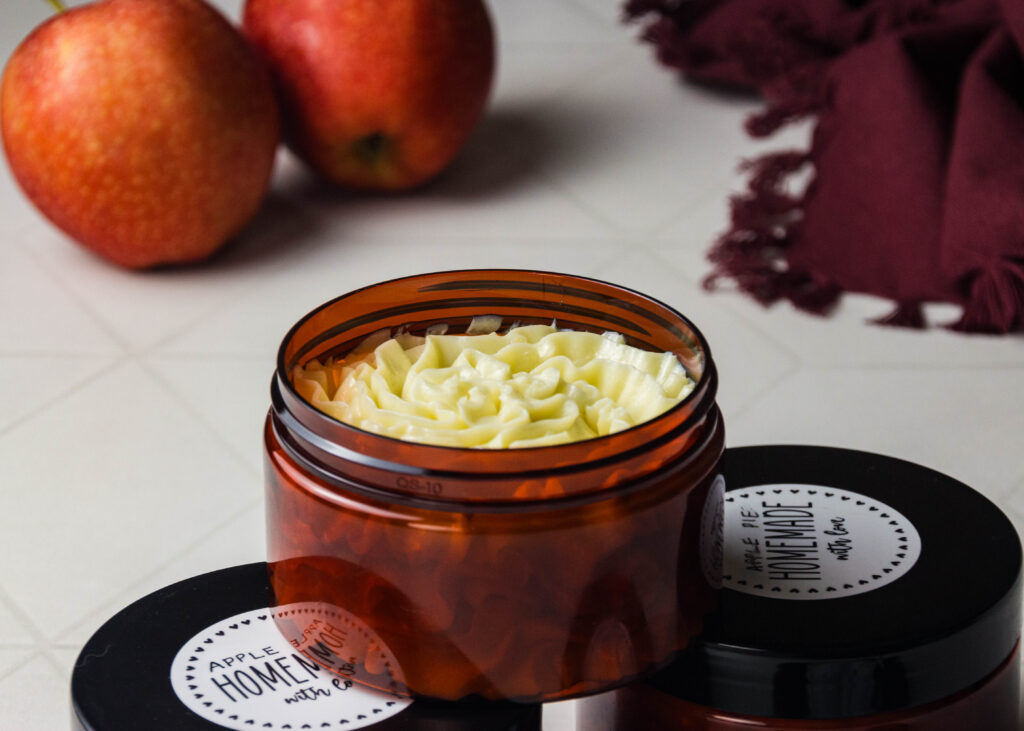
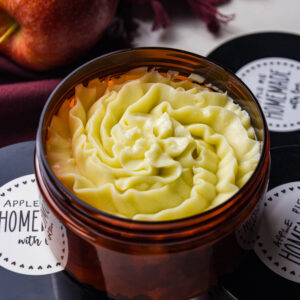
Baking, Crafting, Dreaming

Whipped Shea Butter

There’s something incredibly satisfying about creating your own beauty products at home. You know exactly what goes into them, you can customize them to your liking, and there’s a certain magic in whipping up a concoction that makes your skin feel oh-so-good. Today, 

I’m sharing one of my absolute favorite DIY recipes: Whipped Shea Butter. This luxurious, creamy, and deeply moisturizing blend is perfect for anyone looking to nourish and protect their skin naturally. Plus, it’s a great way to say goodbye to all those unpronounceable ingredients in store-bought lotions. Let’s get started!

Ingredients


Before we dive into the step-by-step process of making this whipped shea butter, let’s go over the star ingredients that make this recipe so special.

  • Shea butter: The base of our whipped butter. Shea butter is famous for its intense moisturizing properties and is packed with vitamins A and E, which help soothe and repair dry, irritated skin.

  • Coconut oil: Coconut oil is known for its ability to hydrate and protect the skin. It penetrates deeply, providing lasting moisture, and its natural antibacterial properties make it great for maintaining healthy skin.

  • Jojoba oil: This liquid wax closely resembles the natural sebum produced by our skin, making it an excellent moisturizer that absorbs easily without leaving a greasy residue. It also helps balance oil production, making it suitable for all skin types.

  • Vitamin E oil: Vitamin E is a powerful antioxidant that helps protect the skin from free radical damage. It also acts as a natural preservative, extending the shelf life of your whipped butter.

  • Cornstarch: This is a little secret ingredient that helps give the whipped butter a light, airy texture while reducing any greasiness. It’s optional, but I highly recommend it for a silky smooth finish.

  • Essential oil (optional): Here’s where you can get creative! Choose your favorite essential oils to add a lovely fragrance and additional skin benefits. Lavender, tea tree, and peppermint are popular choices, but feel free to mix and match to create your perfect blend.

Now that we have our ingredients ready, it’s time to start crafting our whipped shea butter!

Melting the Ingredients

To begin, set up a double boiler on your stove. If you don’t have a double boiler, no worries! You can easily create one by placing a heatproof bowl over a pot of simmering water. Make sure the water doesn’t touch the bottom of the bowl; we want gentle, indirect heat to melt our ingredients slowly and evenly.

In your double boiler, combine the shea butter and coconut oil. Melt them over medium-high heat, stirring occasionally to help them blend together. It’s important to use medium-high heat to ensure that the oils melt evenly without overheating. Overheating can cause the oils to lose some of their beneficial properties, so patience is key here!

Once the shea butter and coconut oil have melted into a smooth liquid, remove the bowl from the heat. This is when you’ll add the jojoba oil and vitamin E oil. These oils are more delicate, so we don’t want to expose them to too much heat. Stir them into the melted butter and coconut oil mixture until everything is well combined.

Whipping the Shea Butter

Now comes the fun part—whipping our mixture into a light, fluffy cloud of moisturizing goodness! Before we start whipping, though, we need to cool our mixture down. Place the bowl in the freezer for about 15-20 minutes, or until the mixture has firmed up slightly but isn’t completely solid. It should have a soft, scoopable consistency.

Once your mixture is at the right consistency, take it out of the freezer and grab your hand mixer. Begin whipping the mixture on medium speed, gradually increasing to high speed. Whip for about 3-5 minutes, or until the butter becomes creamy and light.

Next, add in the cornstarch and any essential oils you’re using. The cornstarch will help create a fluffy texture and reduce the greasy feel of the butter on your skin. Whip the mixture again for another few minutes, until it’s super fluffy and has almost doubled in size. You’ll know it’s ready when it looks like a bowl of whipped cream!

Finally, transfer your whipped shea butter to a sealable container. I love using glass jars because they’re eco-friendly and look beautiful on my bathroom shelf. Make sure your container is clean and dry before transferring to avoid any contamination.

Moisturizing Benefits of Ingredients

Let’s take a moment to appreciate the powerhouse ingredients we’ve just whipped up into a luscious body butter and why they’re so fantastic for your skin.

  • Shea Butter: Shea butter is extracted from the nuts of the shea tree and has been used for centuries in Africa for its amazing moisturizing properties. Rich in vitamins A, E, and F, shea butter promotes skin elasticity and reduces inflammation, making it perfect for dry, sensitive, or irritated skin. It’s also known to boost collagen production, which can help reduce the appearance of fine lines and wrinkles over time.

  • Coconut Oil: Coconut oil is another hero ingredient in our whipped butter. It’s full of medium-chain fatty acids, which have antimicrobial properties. This makes coconut oil not only an excellent moisturizer but also great for preventing skin infections. It also helps lock in moisture by creating a protective barrier on the skin’s surface.

  • Jojoba Oil: Unlike other oils, jojoba oil is structurally similar to the natural oils produced by our skin. This means it absorbs quickly and won’t clog pores, making it ideal for both dry and oily skin types. Jojoba oil is also packed with vitamins and minerals that nourish and protect the skin, such as vitamin E, B-complex vitamins, and zinc.

  • Vitamin E Oil: This oil is a potent antioxidant that helps neutralize free radicals, which can cause premature aging of the skin. It’s also incredibly moisturizing and helps soothe dry, flaky skin. Vitamin E is especially beneficial for those with scars or stretch marks, as it promotes skin healing and regeneration.

  • Cornstarch: While cornstarch might seem like an odd ingredient in a body butter, it plays a crucial role in achieving that light, non-greasy texture. Cornstarch helps absorb excess oil, giving your whipped shea butter a silky, powdery finish that feels delightful on the skin.

  • Essential Oils: Essential oils not only add a wonderful scent to your whipped butter but also come with their own set of skin benefits. For instance, lavender oil is known for its calming properties and ability to soothe irritated skin, while tea tree oil has antibacterial and antifungal properties that can help with acne or minor skin irritations. Choose oils that suit your skin’s needs and your personal scent preferences!

And there you have it—your very own homemade whipped shea butter! This DIY project is more than just a fun activity; it’s a way to take control of what you’re putting on your skin and ensure it’s packed with nourishing, natural ingredients. Whipped shea butter is incredibly versatile, too. Use it as a daily moisturizer, a deep conditioning treatment for your hair, or even a soothing balm for dry, cracked hands and feet.

Making your own skincare products can be a deeply satisfying and empowering experience. It allows you to customize your creations to your liking, from the scent to the texture, ensuring that every jar of whipped butter is uniquely yours. Plus, it’s a wonderful way to practice self-care and treat yourself to a bit of luxury—without breaking the bank.

So, why not give it a try? Your skin will thank you for it. And once you experience the silky smooth, deeply hydrated feeling of your skin after using this whipped shea butter, you might just find yourself ditching those store-bought creams for good.

Happy whipping, and enjoy the natural glow!

If you decide to make this whipped shea butter, I’d love to hear how it turned out! Share your creations on social media and tag me so we can all revel in the joy of natural, homemade skincare together. Here’s to healthy, happy skin!

Whipped Shea Butter

Discover the secrets to luxuriously smooth skin with this simple, nourishing whipped shea butter recipe.
Cook Time 20 minutes
Servings 2.5 cups

Equipment

  • Double Boiler

Ingredients
  

  • 1 cup shea butter
  • ¼ cup coconut oil
  • ¼ cup jojoba oil
  • ¼ teaspoon vitamin E oil
  • 1/2 cup cornstarch
  • 2 tbsp apple pie soap scent optional

Instructions
 

  • In a double boiler, place the shea butter and coconut oil in a bowl.
  • Melt over medium high heat, until completely liquid.
  • Add in the coconut, jojoba, and vitamin E oil. Mix until combined
  • Place in the freezer to cool it quickly, until it becomes firm.
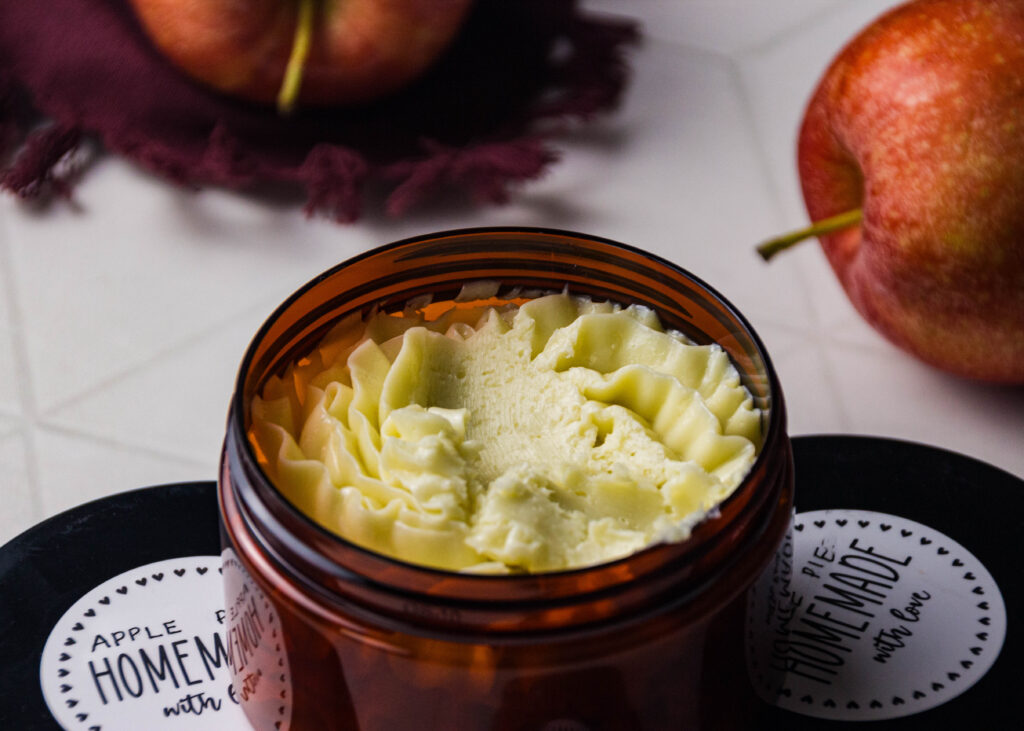
  • Remove from the freezer and use a hand mixer to whip it for a couple minutes until creamy.
  • Then add in the vitamin E oil and cornstarch. Whip again until the mixture is super fluffy and doubles in size.
  • Transfer to a sealable container and store for daily use!
Keyword diy moisturizer, whipped shea butter

Related Articles

Protein Chocolate Chia Pudding

This simple and nutritious Protein Chocolate Chia Pudding combines chia seeds, hemp protein, cocoa, and oat milk for a rich, chocolatey treat. Prep time is only 5 minutes, with a 4-hour chill time for the pudding to set. Just mix the dry and wet ingredients, refrigerate, and enjoy a healthy protein-packed snack or dessert.

Read More

Chai Latte Oatmeal Cookies

There’s something undeniably comforting about the smell of freshly baked cookies wafting through the kitchen. It’s a universal symbol of home, warmth, and love. But

Read More

Chocolate Zucchini Bread

There’s something magical about the combination of chocolate and zucchini. Yes, you read that right—zucchini! This delightful, moist, and rich chocolate zucchini bread is one

Read More

DIY Bug Repellant Candles

Why not try making your own DIY bug repellant candles? Let’s dive into this refreshing project that combines natural ingredients and essential oils to keep those insects at bay.

Read More

Deirdra Lambright

Food Photographer, Blogger & Content Creator

Anyone who knows me, knows I have several obsessions. Baking, personal growth, self care, organization, hosting and so much more.

This lifestyle blog is a promise to myself to live with purpose driven intention and inspire others to…

Deirdra Monet

This is the heading

Lorem ipsum dolor sit amet consectetur adipiscing elit dolor

Explore our Baking Videos!

Strawberry Frosty

Let's whip up a delicious strawberry frosty together!
0 Shares
Pin
Share
Share